Here is how you can change the names and add a custom label to the phone buttons.
Changing Phone Buttons
How to Access SNAPbuilder (Office Managers)
- Login to the Echo Manage Portal at https://manage.echonet.works as an OFFICE MANAGER.
- Click the Inventory tab > Then click Phone Hardware > Then click on the Gear icon on the right side of the phone you are trying to access and follow the steps below starting with the headline SNAPbuilder, below the next header.
How to Access SNAPbuilder (Basic Users)
- Login in to the Manager Portal
- Click the Phones tab > Then click on the Gear icon on the right side of the phone

SNAPbuilder
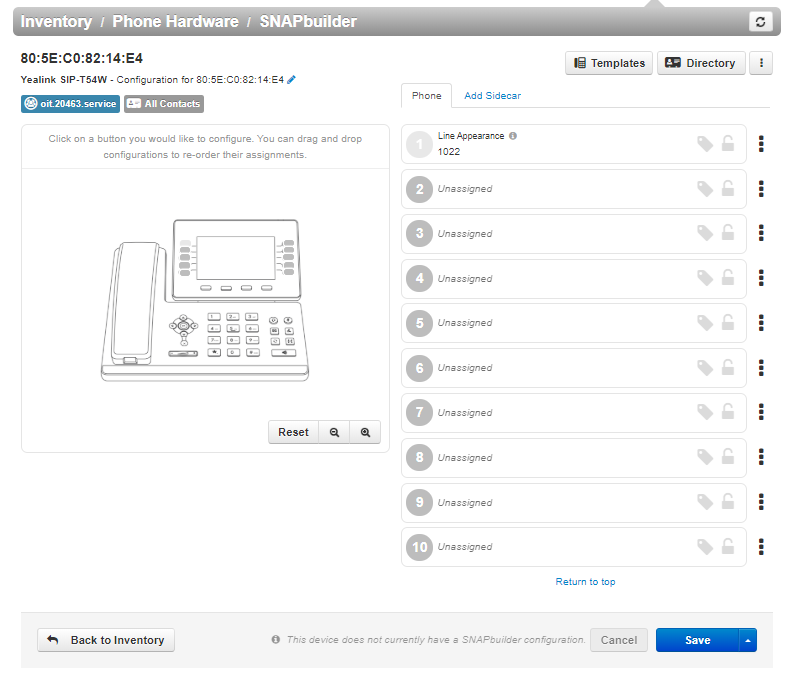
NOTE: Button 1 should always be set to your Line Appearance, do not change it as it's by default and your phone will not work if changed.
- You are now on the SNAPbuilder Page. Here, you can see your phone with the MAC Address and also how many buttons you can customize based on your phone.
- Click on any button number on the right and you will see "Select a Feature"
Line Appearance - line registration to the device
Shared Line Appearance - adds a shared line that can be added to multiple devices
Users (BLF) - allows us to see the present status of another extension, can also be used to call the extension
Call Park - allows you to park the active call and also use the button to retrieve the call at a later point
Speed Dial - allows calling a specific destination either on-net or off-net
- The phone should have no more than 1 Line Appearance
- You can also add a Custom Label to make it easier for you when you add a button
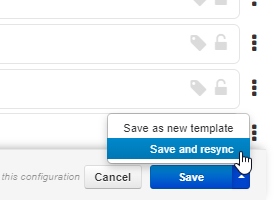
- Once you have made the changes on your phone's keys, Click the Up-Arrow Key right next to the Save button and then click on Save and Resync.